
Within GTrak3 you can add new users whilst also edit and delete existing users. After you create a new user they will be able to access parts of the system depending on the permission/access that you have given that user.
Topics covered in this article.
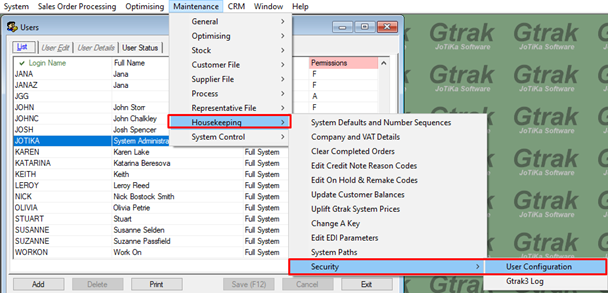
To access the main window to manage your systems users, a system administrator or a user with the correct permissions will only be able to see the Maintenance Menu item.
- Maintenance
- Housekeeping
- Security
- User Configuration
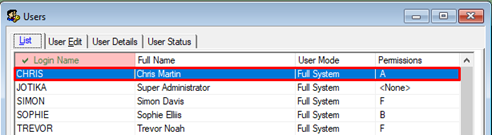
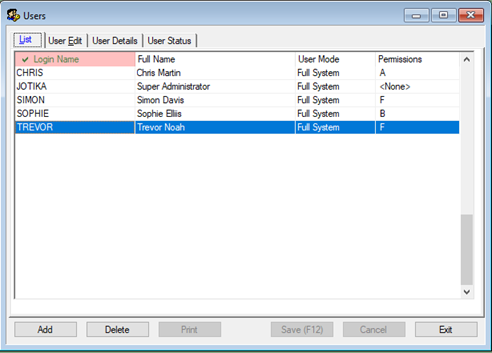
This should open the User Configuration Window. Here you will be able to see the list of all the users currently registered to your system.
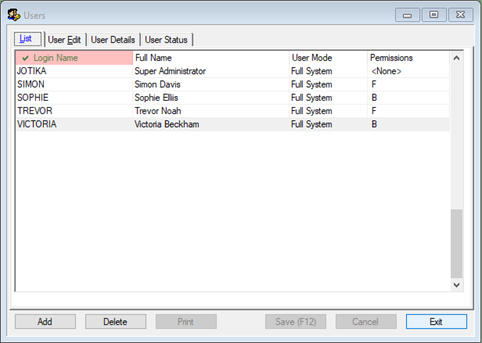
On the user configuration window located at the bottom left there will be a Add Button, pressing that will take you to a new tab called User Edit, this is where you will be able to create a new user. You may have noticed that the tabs at the top are greyed out and no longer let you navigate through them, if you clicked the button by accident or want to return back to the user configuration list simply press the cancel button and tabs should reactivate.
|
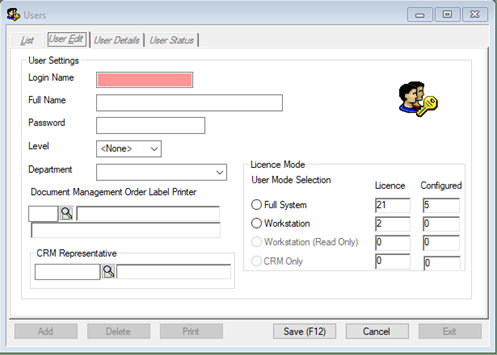
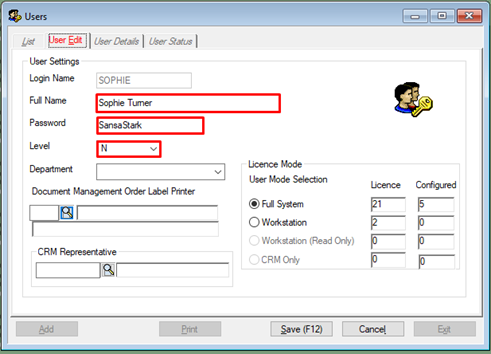
Login Name |
The username to log into the system |
|
Full Name |
The users full name, it will appear on the login screen |
|
Password |
The user’s password they create, has to be 5 characters or more to be accepted. |
|
Level |
The user’s permission level, the further down the alphabet the less permission or access they have |
|
Department |
The department that the user works under |
|
Document Management Order Label Printer |
Some users will have a designated label printer that they are connected to. The magnifying glass will list all the registered printers on the system. |
|
CRM Representative |
Some users may also be a CRM Representative; this will connect the user to that representative ID. The magnifying glass will open a pop-up listing all the Company Representatives on the system. |
|
License Mode |
The type of license the user will be using. The number shown in licence box indicates the number of users that can be on the system at the same time and configured box indicates how many users have been created. Workstation and CRM Only licenses are tend to be setup by either your IT Team or by JoTika if you have requested it to be setup a specific way. |
Here is an example of the add user information filled in.
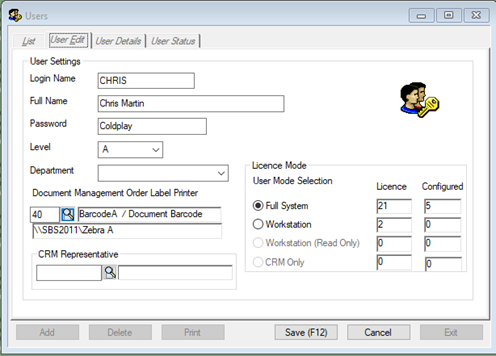
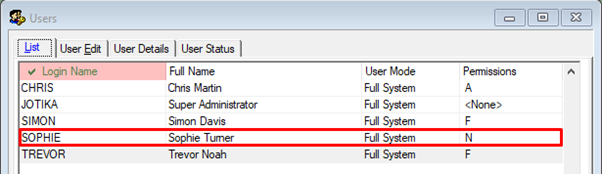
Once you’re happy with the user you want to create is setup correctly press "Save" or (F12) and that user will be successfully created for you. Once saved the tabs will reactivate and allow you to navigate through the tabs again, now on your list Chris should appear.
If a user wants to update their password or wants to change their name that appears when they login simply double click on the user on the list or highlight the user you want to edit and click on the “User Edit Tab” and change the information that you want to change.

Once happy just press “Save" or "F12” and your list will now update to the new information.
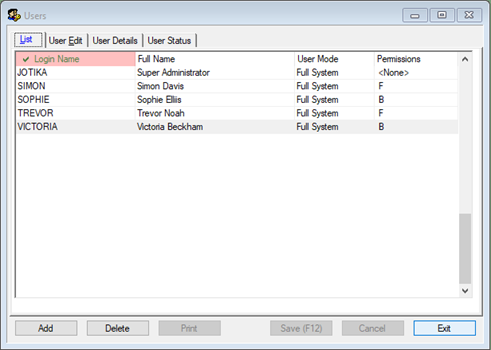
If someone has left the company or you no longer want them to access the system deleting their user off the system is so simple just press the “Delete” button located on the bottom left, once pressed a prompt will appear confirming you want to delete the user. Press "Yes" and it will delete the user and automatically update the user list, pressing "No" will cancel the delete and return you to the user’s screen again. As you can see in the images below Victoria Beckham's user has been deleted.
Comments
0 comments
Please sign in to leave a comment.